Brick Bonds & Patterns
Brick bond is the way bricks are arranged in a wall. Learning the pattern helps you recognise existing brickwork, understand older buildings and choose a closer match for repairs or extensions.
Important: a bond can help identify a wall, but it does not prove the brick manufacturer, age or structural suitability.
Common Brick Bond Patterns
Use this quick reference chart to compare the main brick bond patterns you may encounter in UK brickwork. The individual sections below explain what to look for when identifying each bond.
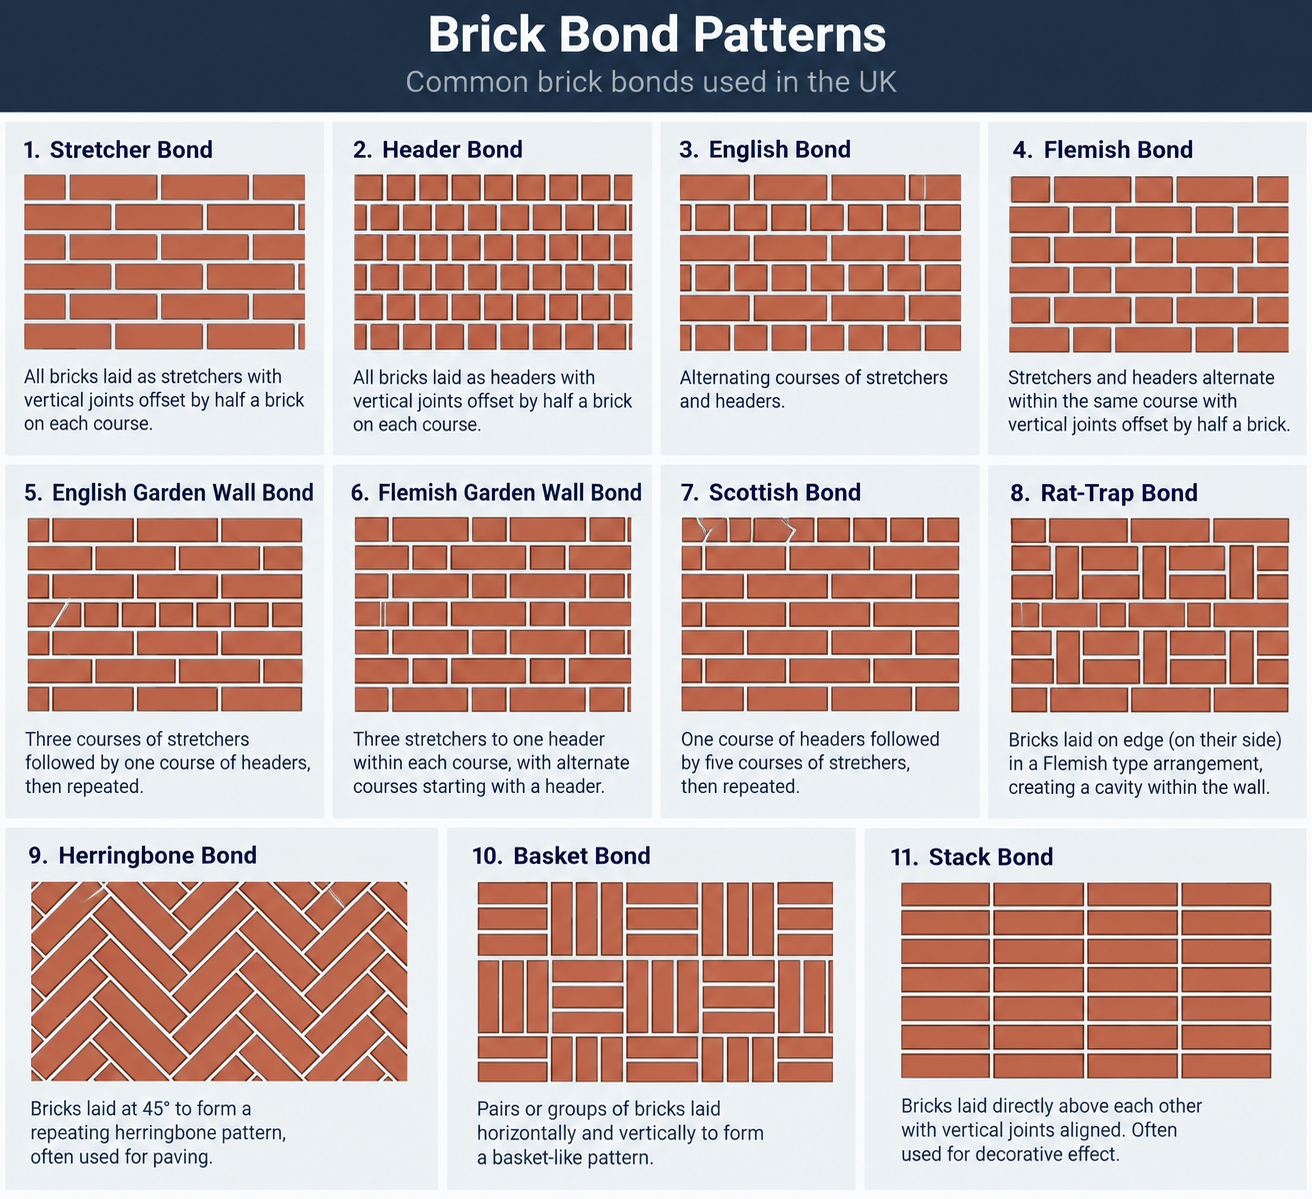 Open the full-size brick bond pattern chart →
Stretcher Bond
Every visible brick shows its long face, called the stretcher. Each course is normally offset by half a brick so the vertical joints do not line up.
English Bond
English bond alternates complete courses of stretchers and headers. One row shows the long face; the next row shows the short end of the brick.
Flemish Bond
Headers and stretchers alternate within the same course. The courses above and below are arranged so the joints remain bonded rather than forming continuous vertical lines.
English Garden Wall Bond
Usually three courses of stretchers followed by one course of headers. Some traditional examples use five stretcher courses between header courses.
Flemish Garden Wall Bond
A repeating arrangement with more stretchers and fewer headers than full Flemish bond. It gives a patterned face while using fewer header bricks.
Header Bond
All the visible bricks show their short end, or header. It is often associated with thicker traditional walls and can work well around curves.
Stack Bond
Bricks are placed directly above one another so the vertical joints line up. It is mainly decorative and needs suitable structural design and reinforcement where required.
Herringbone Pattern
Bricks are laid diagonally, usually at around 45 degrees, creating a zig-zag pattern. It is often seen in paving, panels and decorative infill.
Rat-Trap Bond
Bricks are laid on edge, creating a cavity-like arrangement. It can save material but is not automatically suitable for every wall or loading condition.
How to identify a bond from a photograph
- Take a straight-on photograph at least one metre wide if possible.
- Include several courses, not just one brick.
- Look for short header faces as well as long stretcher faces.
- Check whether headers form complete courses or alternate within a course.
- Photograph the corner where possible; the corner often reveals the setting-out pattern.
- Use natural light and avoid glare, heavy shadow and wet surfaces.
For replacement work, compare the actual brick size, colour, texture, mortar and bond. A similar-looking bond does not guarantee that the new brick is a suitable match.